

![[Week 3] Hosting and type checking in Ruby](https://cdn.hashnode.com/res/hashnode/image/unsplash/kME9jbKd--s/upload/v1641820367450/z7q5un_GO.jpeg?w=1600&h=840&fit=crop&crop=entropy&auto=compress,format&format=webp)


Introduction
In the last blog I shared about starting a project from scratch with Rails 7, tailwindcss, Tailkit and using Devise for authentication. Week 3 was a slow week, some things happened at work and I got a little demotivated. I was supposed to work on OmniAuth integration and add integration and system tests for the authentication flow, but that didn't happen. In fact, the plan had changed, I had decided to ditch Devise and build my own authentication flow instead. I see this as a good opportunity to learn not just to build the authentication flow but also to add tests for all the codes that I am going to write with MiniTest. By building my own authentication, I would have total control of what's happening and there will be no magic. However, that's for next week. What I have done for week 3 were:
- Hosting my app on Render with both Production and Staging environments
- Adding Sorbet to the code base for static type checking
Hosting with Render
I am using Heroku at work and actually started off with Heroku for this app too. However, I kept experiencing super slow page load on Heroku free tier. I wasn't sure what the problem was but I did find out that Render does offer a free tier now too. From what I was seeing on the price comparison, Render is going to cost me much lesser when the app grows. Hence, I decided to give it a go.
Heroku is well-known for its super easy setup, but I found that Render wasn't that hard either. There were definitely more steps to get it up and running, but the documentation for hosting Rails app was adequate for me a first time user to start using it. I did face some problems and have some questions here and there, and I am going to list them down here for anyone that is having the same problems or questions.
How to set up both staging and production environments?
There is a discussion on the forum on this matter. And the TL;DR is that you can easily do that with the render.yaml file.
databases:
  - name: budgetyourtime-prod
    plan: Free
  - name: budgetyourtime-stag
    plan: Free

services:
  - type: web
    name: budgetyourtime-prod
    env: ruby
    plan: Free
    branch: main
    buildCommand: "./bin/render-build.sh"
    startCommand: "bundle exec puma -C config/puma.rb"
    envVars:
      - key: DATABASE_URL
        fromDatabase:
          name: budgetyourtime-prod
          property: connectionString
      - key: RAILS_MASTER_KEY
        sync: false
      - key: RAILS_ENV
        value: production
      - key: RACK_ENV
        value: production
  - type: web
    name: budgetyourtime-stag
    env: ruby
    plan: Free
    branch: develop
    buildCommand: "./bin/render-build.sh"
    startCommand: "bundle exec puma -C config/puma.rb"
    envVars:
      - key: DATABASE_URL
        fromDatabase:
          name: budgetyourtime-stag
          property: connectionString
      - key: RAILS_MASTER_KEY
        sync: false
      - key: RAILS_ENV
        value: staging
      - key: RACK_ENV
        value: staging
PS: Render also offers Preview Environments which sounds pretty cool where they will create an environment for all your pull requests, so that you don't have to manually deploy it to staging for testing. I haven't tested it myself, but I would love to try this feature out.
Problem with Blueprints syncing and first deployment
Render has this pretty cool Blueprints feature where you can connect to your desired repo and select the branch with the render.yaml above. Following the instructions, you will be asked to key in your RAILS_MASTER_KEY before Render start creating the databases and the web services for you. I had some problems here when I completed the process, things seemed to be hanging, and I have to hit refresh and click on the Manual Sync button to see it starts running.

However, both deployments failed for the first time and the errors were that RAILS_MASTER_KEY was missing which I thought I added in the previous step. To fix it, go to the Dashboard tab and add RAILS_MASTER_KEY to both the production and staging services. It will look something like this:
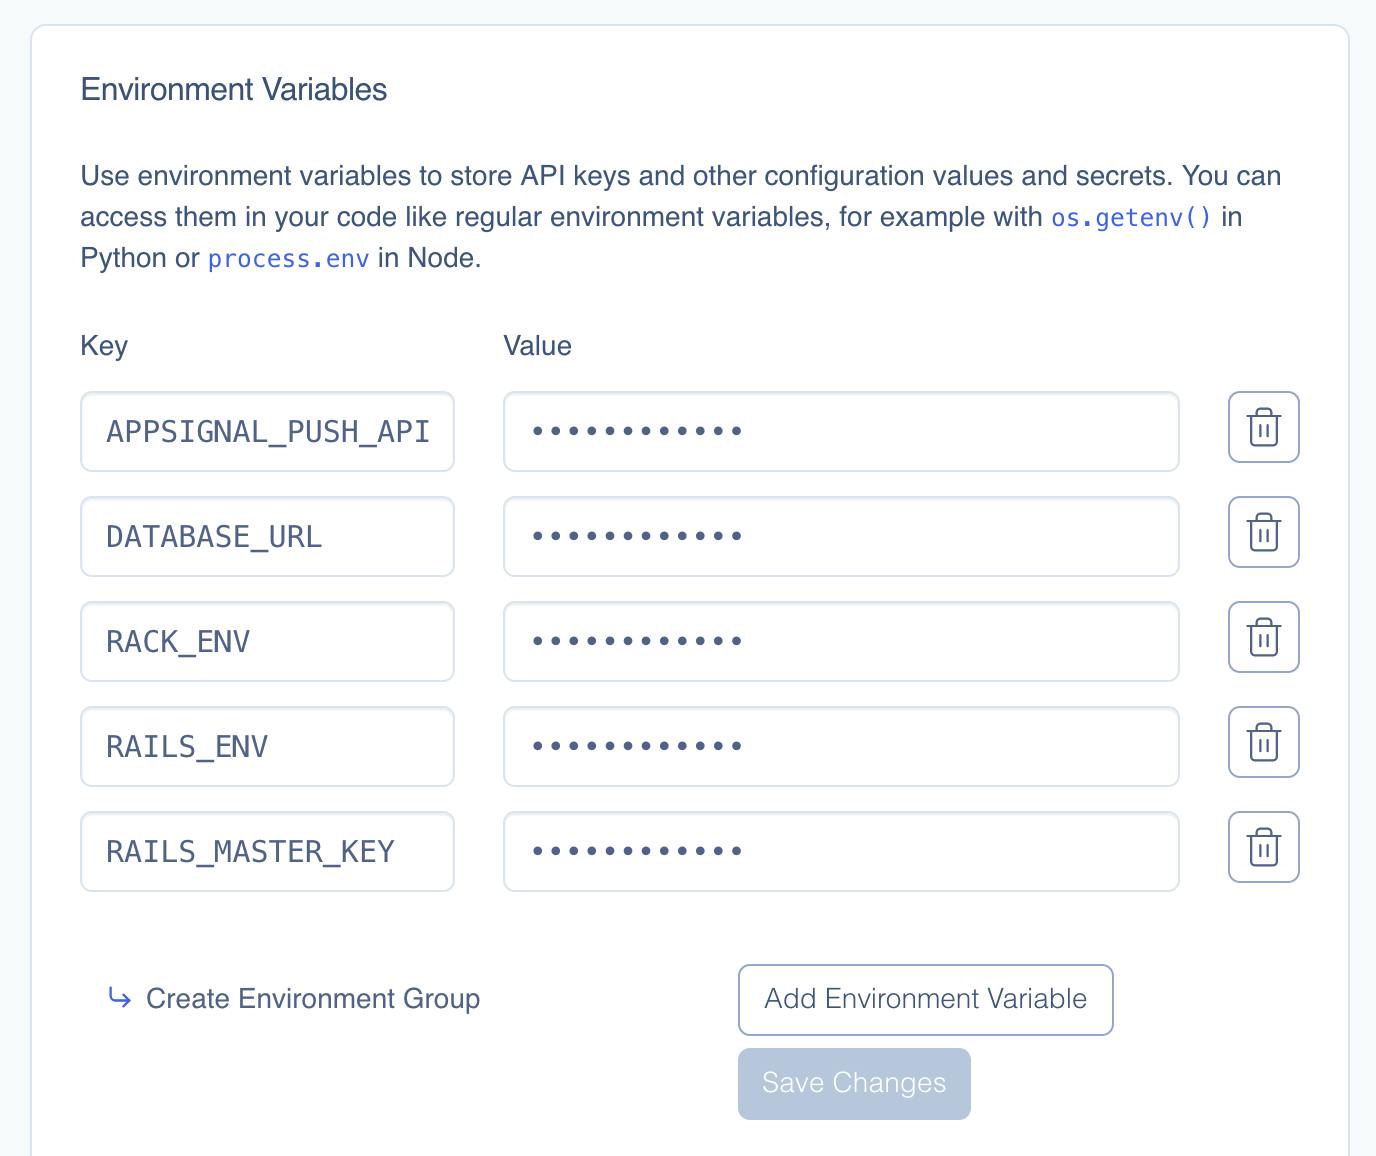
After you have added the keys to the environment variables, the deployment should start automatically and this time it should work! With a setup like this, deployment will start automatically when you merge codes into the branch you have set above in your render.yaml.
Setting up a custom domain is pretty easy as well, this guide should be all you need to set up a custom domain for your app hosting on Render.
Extra variables in the render.yaml file
If you are following the tutorial on hosting a Rails app with Render, you might realize that there are some additional variables in my render.yaml file.
- For the databases, I have added the
plan: Freevariable, because for some reason if I don't specify it, it will default to theStarterplan which cost $7/month and you can't downgrade from Starter to Free. For now, my app is not ready for production yet so I am going to use Free for both the staging and production databases.databases: - name: budgetyourtime-prod plan: Free - name: budgetyourtime-stag plan: Free - For web services, I have also added the
plan: Freefor the same reason as above, andbranch: mainfor the production web service. I have to specify it because we are setting up both Production and Staging environment in onerender.yamlfile, and while following the Blueprints deployment instructions, render only allow me to select one branch through their UI.services: - type: web name: budgetyourtime-prod env: ruby plan: Free branch: main
Static type checking in Ruby with Sorbet
I have known Sorbet for quite a while, and also read about Ruby is slowly adding type to the language itself, but never really work with Ruby code with type. I do use Typescript at work and I can see the benefits of it for a better development experience. One example is, the editor will just shout at me telling me that I am passing an argument with the wrong type to a function. But still, I never really have the urge to try out Sorbet with Ruby until I read about the Sorbet team open-sourcing the sorbet VS Code Extension and seeing the examples they provided.
I think I will enjoy those additional features while working with Ruby code and decided to give it a try. Even though I am not using Visual Studio Code, but I think I could still get it to work with Nvim.
I tried to follow Sorbet's official doc on getting started guide but couldn't get it to work. All I have added from the guide was adding the gems:
gem 'sorbet', :group => :development
gem 'sorbet-runtime'
After some research, I found out about tapioca by Shopify. Shopify adopted Sorbet too and came out with a different approach on generating the RBI (Ruby interface) files for use with Sorbet. The README is well written and it was pretty easy to follow and get it to work. In short, they are 5 steps:
- Install the gem
group :development do gem 'tapioca', require: false end - Run
tapioca init - Run
tapioca gems - Run
tapioca todo - Run
tapioca dsl
PS: To have a better understanding of what each step is doing, do check out the README guide
I have to do something else to get the Sorbet language server to work with my editor, but if you are using VS Code, the extension might be all you need (PS: I am not sure because I don't use VS Code).
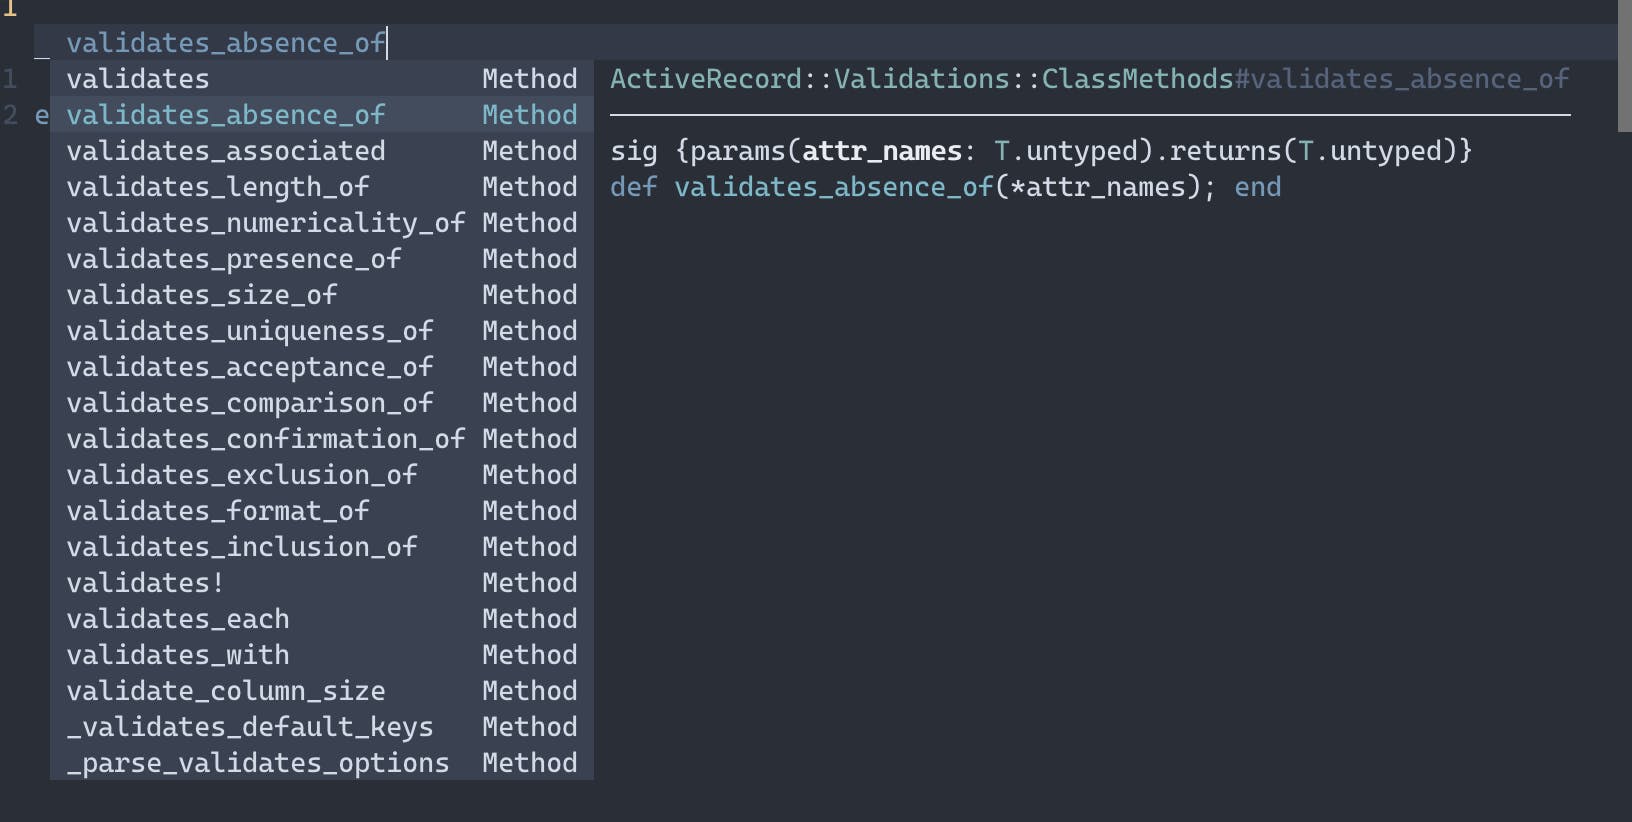
I have been using solargraph as the Ruby language server and it does provide code navigations, method completion and etc. But now with Sorbet, I get a few more features.
- Catching wrong argument type:
# typed: true
# frozen_string_literal: true

module FlashHelper
  extend T::Sig

  sig { params(key: String).returns(String) }
  def classes_for_flash(key)
    case key
    when "alert"
      "bg-red-600"
    when "notice"
      "bg-blue-600"
    else
      "bg-green-600"
    end
  end
end

- Autocomplete with definitions for methods provided by DSL like ActiveRecord. These will not only work with rails DSL but also with third-party gems installed.
I haven't used it long enough to justify if it's a good addition to the codebase. So far, I am impressed and enjoying those additional features in my workflow with Ruby code. However, I do have some questions that I haven't figured the answer out. Please leave a comment if anyone reading knows the answer to it.
- How to work with Sorbet in MiniTest? With the above helper method, I have added a helper test like below. Note that, I have to manually include
FlashHelperto get the type to work otherwise it will complain thatMethod classes_for_flash does not exist on FlashHelperTest. Even though the test will work just fine without manual include, because by inheriting fromActionView::TestCaseRails will include the module for us. I haven't figured out what's the right way to do it, or I should just don't use typing in test, but for now, I am sticking with manually including the module.
# typed: true
# frozen_string_literal: true

require "test_helper"

class FlashHelperTest < ActionView::TestCase
  include FlashHelper

  test "flash banner color classes" do
    assert_equal "bg-red-600", classes_for_flash("alert")
    assert_equal "bg-blue-600", classes_for_flash("notice")
    assert_equal "bg-green-600", classes_for_flash("success")
  end
end
- Is it possible to show the type in
.erbfile too? The above helper method was added for use in theView, so it will be nice if linting can happen in theViewitself too, but I can't seem to find ways to do it.
Conclusion
That's all for this non-productive week. I feel better now and hopefully, next week will be a productive one! Things that I hope to get done by next week is building a fully tested authentication flow from scratch. Thanks for reading, and wishing you a very good day!